Tasty Little Debbie Heart Cakes

Featured in: Desserts

Make these cute heart-shaped cakes inspired by the classic snack! Soft vanilla cake surrounds a marshmallow center, topped with pink candy. Though they take a bit of effort, they taste better than store-bought. Add white chocolate lines for the classic finishing touch!
Twistytaste.com
Updated on Sat, 15 Mar 2025 17:30:59 GMT
Heart-Shaped Pink Snack Cakes Pin it
Heart-Shaped Pink Snack Cakes | twistytaste.com

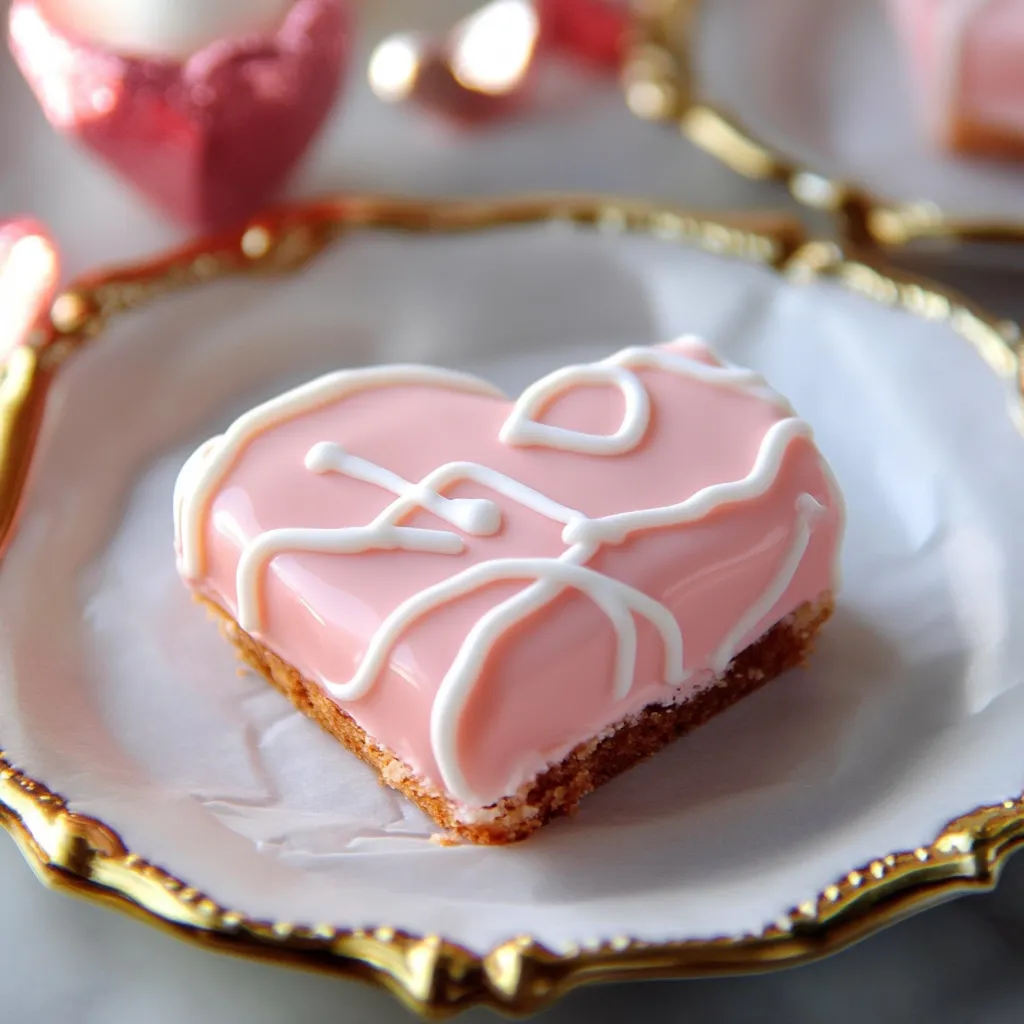
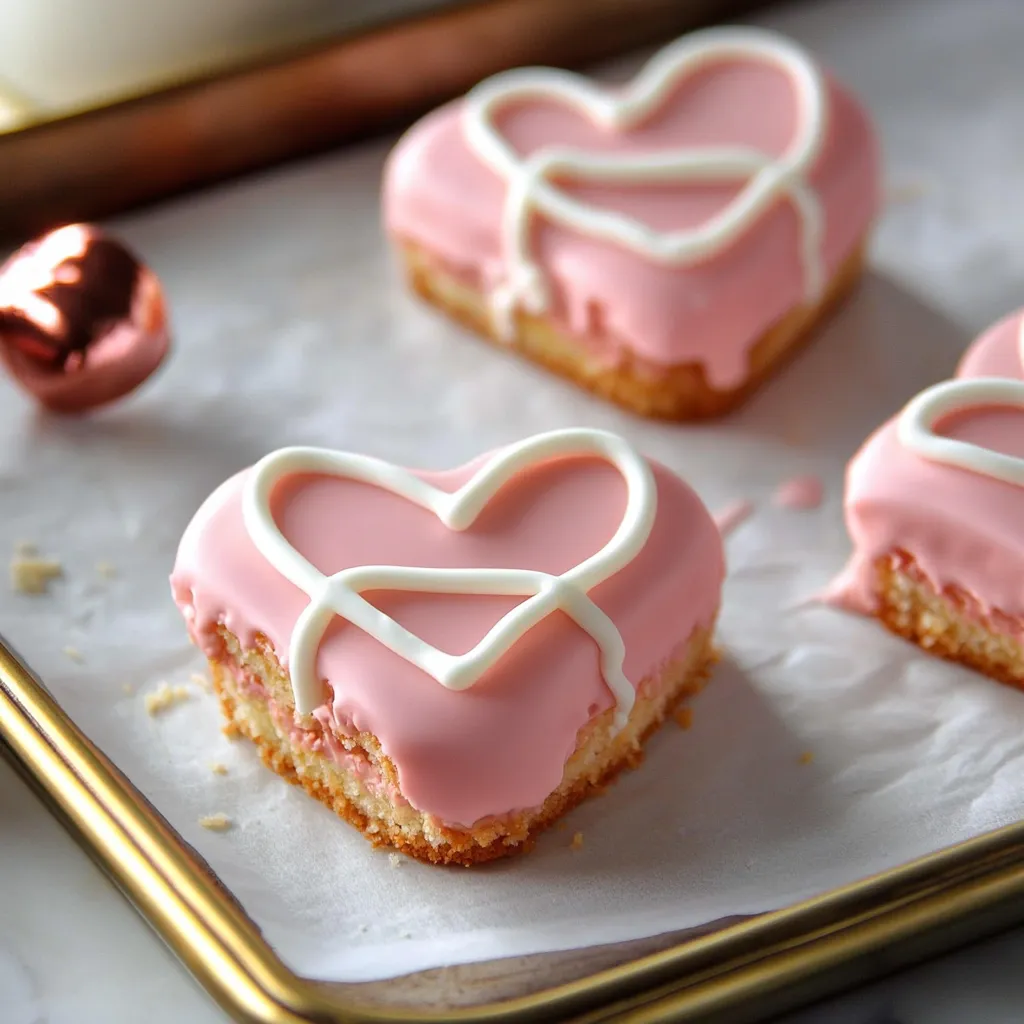
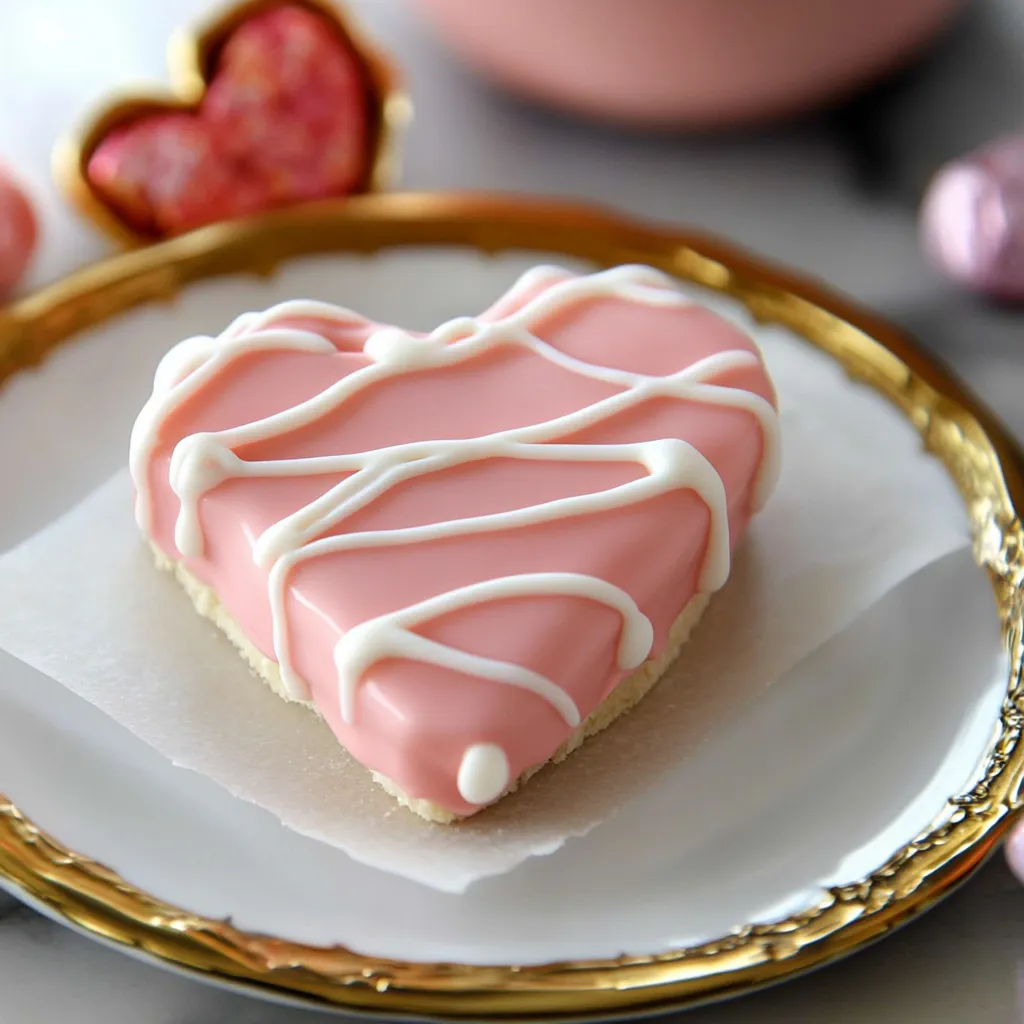
Whip up some sweet memories with these DIY heart-shaped treats. Every mouthful delivers soft vanilla cake with a fluffy marshmallow middle, wrapped in pretty pink candy coating—they're just right for showing love on Valentine's Day.

These cute little cakes take you back to favorite childhood snacks but let you make them fresh at home. The fun of baking and sharing makes the whole experience even sweeter.

Must-Have Ingredients

  • All-purpose flour (2 cups): Makes the soft cake structure
  • Granulated sugar (1½ cups): Adds just-right sweetness
  • Unsalted butter (1 cup): Gives moistness and flavor
  • Large eggs (4): Helps cakes hold together
  • Buttermilk (1 cup): Creates super softness
  • Pure vanilla extract (2 teaspoons): Boosts taste
  • Baking powder (2 teaspoons): Makes cakes rise nicely
  • Fine sea salt (½ teaspoon): Cuts through sweetness
  • Marshmallow fluff (7 oz): Makes the dreamy filling
  • Unsalted butter (1 cup): Gives filling its creaminess
  • Powdered sugar (2 cups): Thickens and sweetens
  • Pure vanilla extract (1 teaspoon): Adds yummy taste
  • Fine sea salt (pinch): Brings out all flavors
  • Pink candy melts (24 oz): Creates the outer shell
  • White candy melts (4 oz): For pretty patterns on top
  • Coconut oil (2 tablespoons): Makes coating nice and smooth

Tasty Preparation Steps

Get Your Cake Ready:
Put parchment in pan. Whip butter till creamy, slowly add sugar. Mix in eggs one by one. Switch between adding flour mix and buttermilk. Tap to pop bubbles.
Cook Till Done:
Pour mix into pan, level the top. Bake until it's golden and doesn't jiggle.
Whip Up Filling:
Beat butter until puffy. Slowly mix in fluff and sugar. Add vanilla and salt, beat until super fluffy.
Finish With Coating:
Dunk frozen cake sandwiches in pink coating. Drizzle white on top for decoration.
Copycat Little Debbie Valentines Cakes Recipe Pin it
Copycat Little Debbie Valentines Cakes Recipe | twistytaste.com

Watching your timing and temps will make these treats turn out just right. Each part builds toward making snack cakes that look and taste amazing.

Ways To Serve

Stack them on fancy plates with some fresh berries and mint. Put one by each person's spot with a little note for parties. Make heart shapes on the table for a pretty centerpiece.

Different Options

Switch vanilla for almond or rose flavors. Put fruit flavor in the filling. Pick another color for coating. Add a layer of chocolate for cocoa fans.

Keeping Them Fresh

Store in sealed boxes with paper between each layer. They'll stay good for 2 days on the counter or 7 days in the fridge. You can freeze uncoated cakes for a month.

These Valentine's Day goodies bring happiness both when you make them and share them. Seeing someone smile when they bite into your homemade version makes all your work worthwhile.

Elegant Copycat Little Debbie Valentines Cakes Pin it
Elegant Copycat Little Debbie Valentines Cakes | twistytaste.com

Frequently Asked Questions

→ Can these be made ahead of time?
Definitely! Store them in a sealed container for a few days, or freeze them if you need them to last longer.
→ Why do ingredients need to be room temperature?
It helps everything mix smoothly, giving you soft and evenly baked cakes.
→ Can I use different candy melt colors?
Of course! Use whatever colors you like to match the occasion.
→ What’s the point of freezing the cakes before coating?
It makes them sturdy, so they’re easier to coat without breaking apart.
→ Can I change the shape of these cakes?
Absolutely! Hearts are fun, but try stars, circles, or any shape for other occasions.

Little Debbie Heart Cakes

Fluffy heart-shaped cakes packed with marshmallow filling and topped in pink candy for a nostalgic treat everyone knows and loves.

Prep Time
30 Minutes
Cook Time
40 Minutes
Total Time
70 Minutes

Category: Desserts

Difficulty: Difficult

Cuisine: American

Yield: 12 Servings (12 individual cakes)

Dietary: Vegetarian

Ingredients

→ Cake

01 1 cup granulated sugar
02 1 1/4 cups plain flour
03 1/2 cup room-temp buttermilk
04 2 1/2 teaspoons vanilla extract
05 1 teaspoon of baking powder
06 1/4 teaspoon fine salt
07 1/2 cup softened unsalted butter
08 2 eggs, brought to room temp

→ Filling

09 1 cup room-temp unsalted butter
10 3 cups sifted powdered sugar
11 1 cup marshmallow creme
12 2 teaspoons pure vanilla extract

→ Coating

13 2 tablespoons melted white chocolate
14 2 1/2 cups pastel pink candy melts
15 3 tablespoons coconut oil

Instructions

Step 01

Set your oven at 350°F. Smear butter on a half-sheet pan, lay down parchment, and butter that as well.

Step 02

Combine flour, salt, and baking powder in one bowl.

Step 03

Beat sugar and butter together until fluffy. Add eggs one at a time, mixing thoroughly, then stir in vanilla. Switch between adding the dry ingredients and buttermilk and keep mixing as you go.

Step 04

Pour the batter onto the sheet pan and smooth it evenly. Bake it for 15 to 20 minutes until the edges lightly brown. Cool for 10 minutes, then chill it in the fridge for 20 minutes.

Step 05

Blend the softened butter and marshmallow cream together until silky. Add the vanilla and powdered sugar, beating until smooth.

Step 06

Cut the cooled cake into heart shapes using a 4-inch heart cutter. Pipe filling onto half of the hearts, top them with the other halves, and freeze the filled cakes for an hour.

Step 07

Heat your candy melts with the coconut oil until smooth. Dunk the frozen cakes into the coating, then chill them for 15 minutes to set.

Step 08

Use the melted white chocolate to swirl designs on top of the coated hearts. Pop them back in the fridge until the decorations are firm.

Notes

  1. These were inspired by Little Debbie's sweet treats!
  2. Store in the freezer if you need to keep them longer.
  3. Everything works better when ingredients are at room temp.

Tools You'll Need

  • A half-sized sheet pan (about 18x13 inches)
  • Mixer (stand or hand)
  • 4-inch cutter in a heart shape
  • A roll of parchment paper
  • Offset spatula for spreading batter
  • Piping bag to add filling

Allergy Information

Please check ingredients for potential allergens and consult a health professional if in doubt.
  • Contains dairy, like butter and buttermilk.
  • Eggs are used in the recipe.
  • Has gluten since it includes wheat flour.