
 Pin it
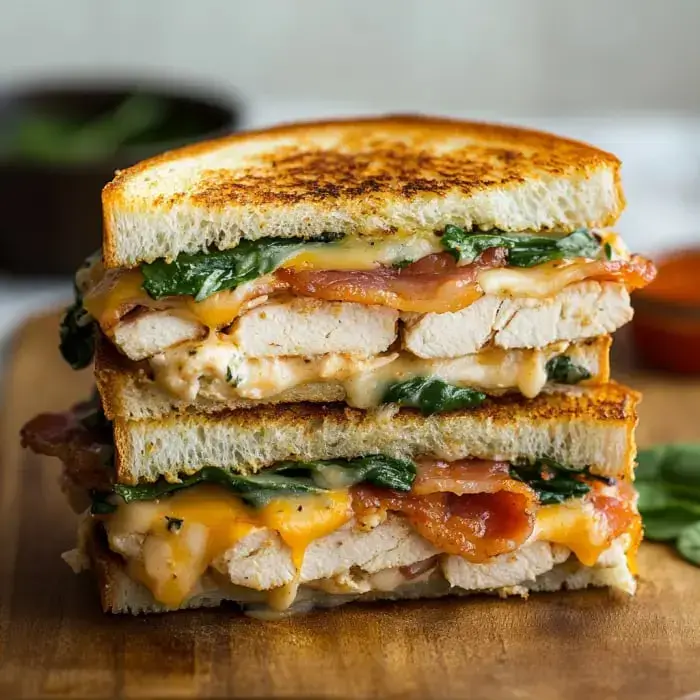
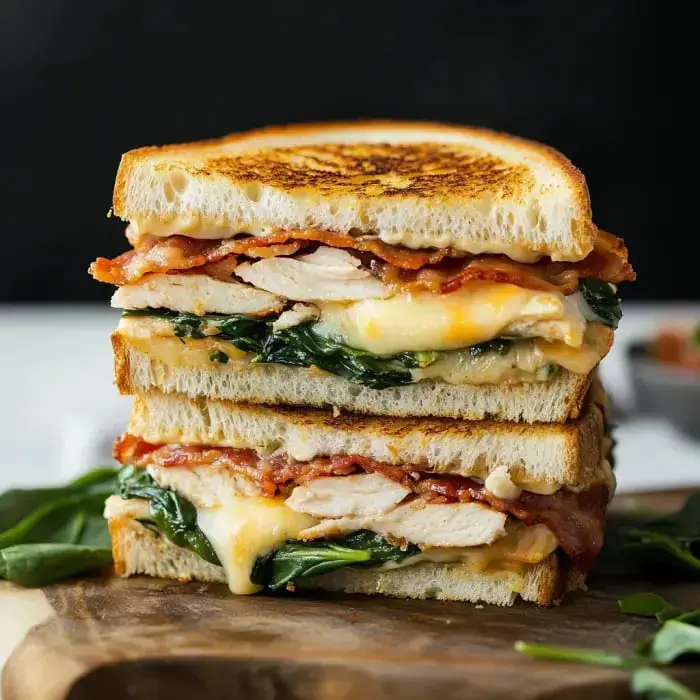
This turkey melt with cheddar, spinach, and bacon makes the perfect cozy sandwich when it's cold outside. You'll love this warm, tasty creation that brings together flavorful turkey, spinach leaves, sliced tomatoes, crunchy bacon, and gooey cheddar all packed between buttery sourdough slices.
An Irresistible Toasted Sandwich
I've always thought that putting together a good sandwich takes real skill, and this turkey melt is my pride and joy. I played around with different combinations until I got it just right. The mix of crunchy bacon, toasty sourdough, and melted cheddar works like magic together. It's now what I crave whenever I want something tasty but don't have much time to cook.
Your Shopping List
- 4 slices sourdough or thick, crusty bread: Pick something substantial that will get crunchy without turning mushy.
- 2 tablespoons honey mustard: Brings a nice sweet and zingy flavor to your sandwich.
- 2 slices white cheddar cheese: Go for something good quality so it melts wonderfully and tastes amazing.
- 4 slices deli turkey: Try smoked or roasted turkey, or use up your holiday leftovers for extra flavor.
- Thin tomato slices from 1 medium red tomato: Gives you juicy freshness in every bite.
- ½ cup fresh baby spinach: Adds a nice green crunch plus some good nutrients.
- 4 strips cooked bacon: Gives you that amazing crispy texture and smoky taste.
- 2 tablespoons butter softened: For coating the bread to make it perfectly golden brown.
Cooking Steps
- Assemble the Sandwiches
- Put your 4 sourdough slices on a flat surface and spread ½ tablespoon honey mustard on each one. Add layers of cheese, turkey, spinach, tomato slices, and bacon evenly across each piece. Put them together carefully so everything stays in place for the best taste experience.
- Toast the Sandwiches
- Spread butter on the outside of each sandwich, using ½ tablespoon per side. Warm up a big skillet on medium heat and cook each side for 3-4 minutes, until they're golden brown and the cheese gets all gooey. Flip them gently with a spatula so they cook evenly.
- Serve Warm
- Move your sandwiches to plates and eat them right away with something yummy on the side, like a bowl of soup or some fresh salad.
Expert Tips
After making tons of these sandwiches, I've learned you can't rush the toasting part. Going slow lets the cheese melt just right while getting that awesome golden crust. I always grate my cheese right before using it since it melts way better than the pre-packaged stuff. And don't forget to butter your bread – that's what gives you that amazing color and crunch.
Tasty Variations
What's great about this sandwich is how easy it is to change things up. Sometimes I'll try different breads like ciabatta or rye instead. When I'm feeling fancy I'll throw in some caramelized onions or spread on a bit of pesto. During holiday season I love adding a spoonful of cranberry sauce which gives each bite a lovely sweet and tangy kick.
 Pin it
Frequently Asked Questions
- → Why’s fresh cheese better?
- Slicing your own cheese makes a big flavor difference—it melts better and tastes richer compared to packaged slices.
- → Can I skip dairy stuff?
- Totally! Swap in plant-based cheese and butter. You’ll still get that gooey goodness with a dairy-free twist.
- → Why butter the bread outside?
- It’s the secret to that golden crunch while keeping your sandwich from sticking to the pan!
- → When should I flip it?
- Give each side 3-4 minutes. Look for a golden crust and gooey cheese before flipping.
- → Why is layering important?
- The order keeps everything together, spreads the flavor evenly, and ensures the cheese melts perfectly.