
 Pin it
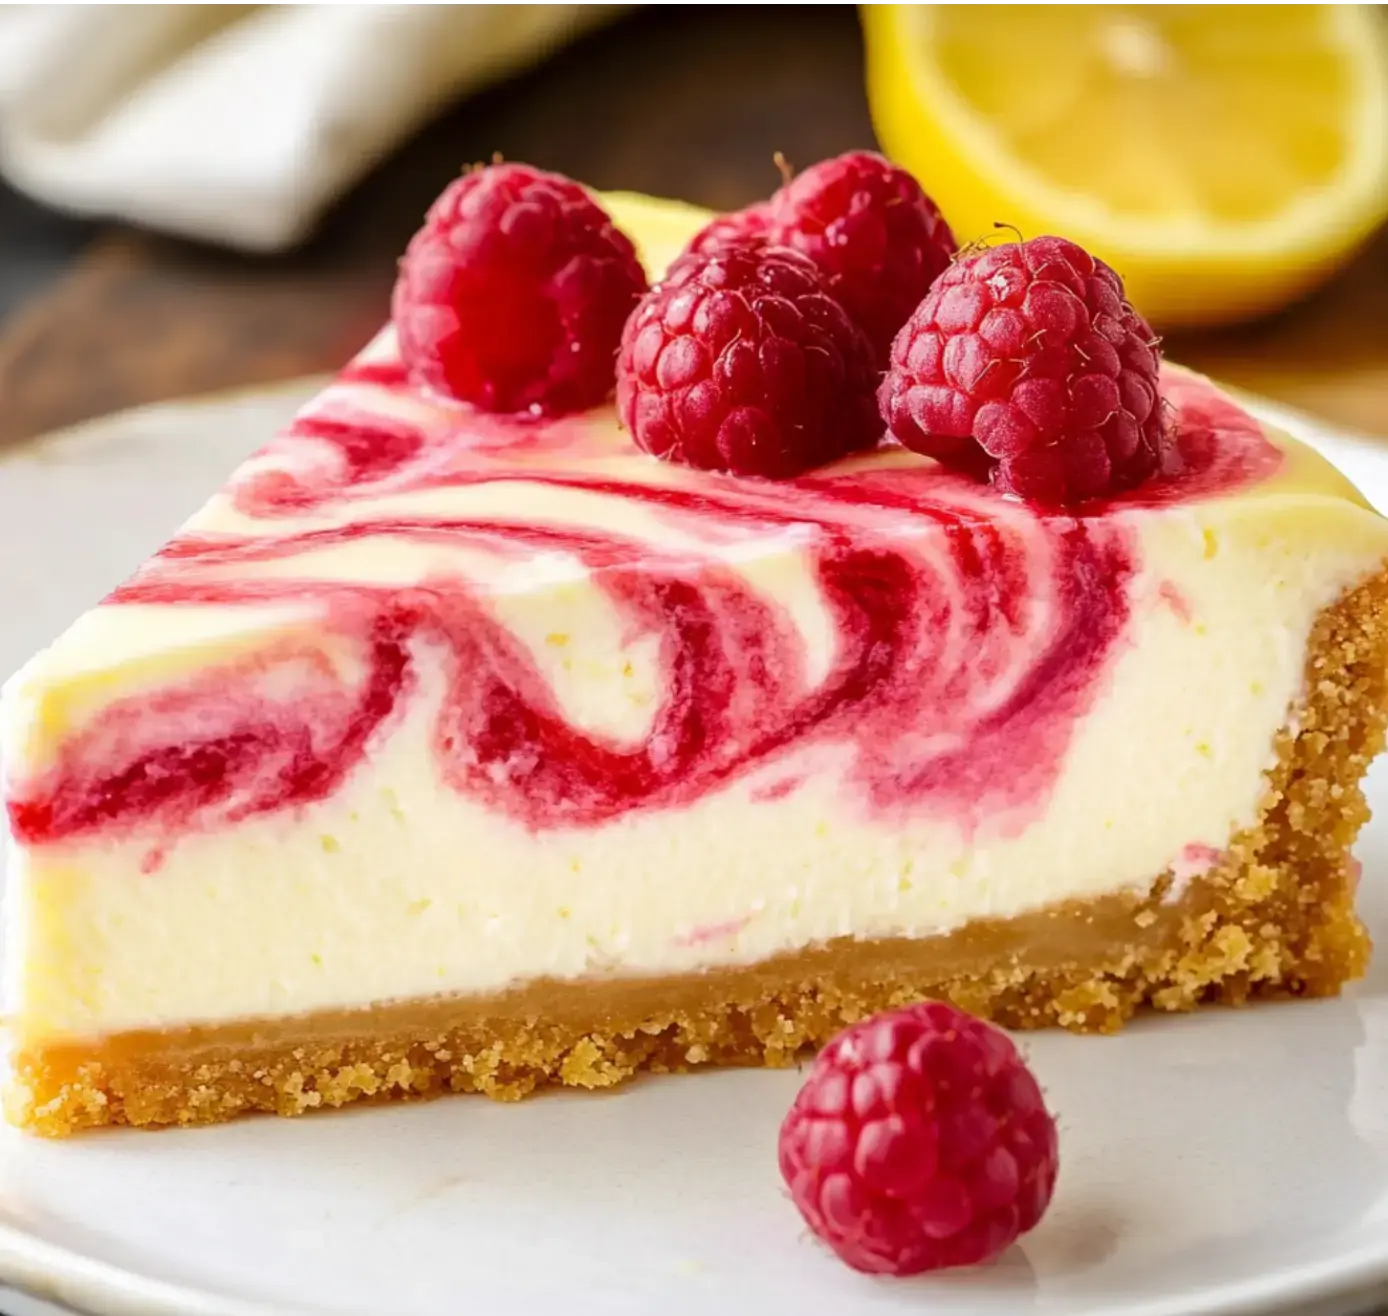
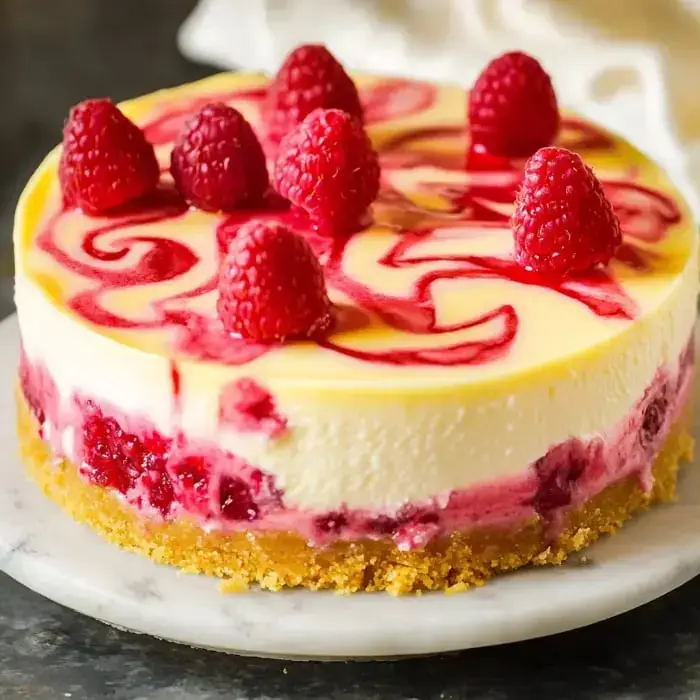
Dreamy Summer Lemon Raspberry Cheesecake
Okay, listen up—I’ve got my number one summertime sweet treat for you. This Lemon Raspberry Cheesecake totally hits the spot, all tangy and sweet at the same time. The lemon gives it that zippy lift, and the pretty raspberry swirl? Makes it look like a total showstopper. Honestly, you’ll want to whip this up for that next cookout or just to wow your fam any evening.
Why You'll Love Making This
The best part about this cheesecake? How the lemon and raspberry flavors mesh together—so fresh, so tasty. It’s lighter than your usual cheesecake, which is awesome for hot days. Every time I serve it, folks go nuts for the punch of lemon zest and that tangy raspberry swirl in every forkful.
What You’ll Need For This Delight
- Creamy Filling Part: Have plenty of eggs (grab three whole plus two yolks), cream cheese that’s softened, a little all purpose flour, sugar for sweetness, lots of lemon juice and zest, and some sour cream for smoothness.
- Tangy Raspberry Sauce: All it takes is cornstarch as a thickener, fresh or frozen raspberries (either works!), a splash of fresh lemon juice, warm water, and sugar to keep it balanced.
- Crust Magic: It’s all about graham cracker crumbs, melted butter, and just a bit of sugar mixed up for the perfect firm base.
 Pin it
How to Pull Everything Off
- Ready the Raspberry Sauce
- Whisk together cornstarch, lemon juice, and water till smooth. Gently heat raspberries and sugar in a saucepan just until they soften. Mix in your cornstarch blend, keep stirring as it thickens, then give it all a blend and pour through a strainer so it’s super silky.
- Bake Your Crust
- Bump the oven up to 325°F. Mix graham crumbs with sugar and butter, press into your pan, and bake for 10 minutes. Cool it fully before adding anything else.
- Mix Up the Cheesecake Center
- Turn the oven down to 300°F. Beat your cream cheese, sugar, and flour till it’s totally smooth. Add in lemon juice, zest, and sour cream. Drop in eggs one by one, then add the yolks at the end.
- The Assembly Fun
- Scoop most of your filling into the crust, swirl in half the raspberry sauce, top off with the rest, and swirl again for those gorgeous streaks.
- Water Bath & Baking
- Wrap your cheesecake pan in foil, place in a bigger tray, fill with water, and bake around an hour and 25 minutes. Leave it to cool off in the oven before refrigerating for a good 6 hours.
- Time to Top & Serve
- Crown it with a handful of raspberries and lemon slices and get ready for everyone to ask for seconds.
Tried-and-True Tricks
Here are my hacks: throw a slow cooker liner in the pan for an easy water bath. Keep your mixer on its lowest speed so you dodge cracks. Let it cool in the oven—don’t rush it. And if you can, let it sit overnight, flavors really come alive by the next day.
Serving It Up & Saving the Rest
I love showing this off as is, but you can always pile on extra raspberries and lemon wheels. Stash leftovers covered in the fridge, they stay good four or five days. If you want to save slices for later, wrap 'em in plastic and foil, freeze, then defrost in the fridge before eating.
 Pin it
Frequently Asked Questions
- → Can I use frozen raspberries instead of fresh?
Definitely—frozen raspberries do the job fine. Toss them in straight from the freezer. Just remember, they'll take a little longer to break down in the pan compared to fresh berries.
- → Why do I need to bake the cheesecake in a water bath?
Water baths keep your cheesecake silky by stopping the top from drying or cracking. All the extra steamy air keeps the texture super smooth.
- → How do I know when my cheesecake is done baking?
If the edge looks solid but the middle jiggles just a bit when you shake it, you’re set. Letting it sit to cool slowly in the oven helps finish the job and leaves it looking perfect.
- → Can this cheesecake be frozen?
Yep, it freezes just great for up to 3 months. Wrap it up tightly with plastic wrap and foil, then thaw in your fridge overnight when you want it again.
- → How far in advance can I make this cheesecake?
This cheesecake is even better made ahead—up to 4 days. Stash it in the fridge. The flavor deepens the next day, so prepping early is a win.